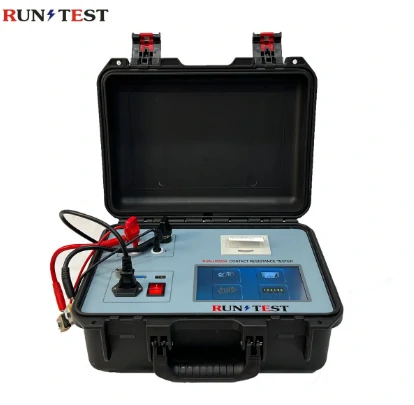
What Key Steps Should Be Noted When Operating the Circuit Breaker Tester?
May 22, 2025
To ensure the safety and reliability of the electrical system, circuit breaker testing is indispensable. A circuit breaker tester is a tool to confirm that circuit breakers work in the right way and that your electrical system is in a good way when there are no problems. The operational steps for using a circuit breaker tester, especially those for high voltage switch testers, are described here in detail.
The Importance of Circuit Breaker Testing
Safety: Regular tests guarantee that in case of a fault, circuit breakers will trip, thus saving personnel from potential damages.
Reliability: Regular inspections can help in locating possible problems early enough to prevent these issues from evolving into failures.
Compliance: Routine tests are necessary in order to obey the rules and regulations and to meet standards related to safety.

Key Process Steps of the Circuit Breaker Tester
1. Readiness
Be sure that you are well-equipped and also that you have full understanding of the specifications of the circuit breaker tester to be used.
If you are going to use a high voltage switch tester, then, follow these steps:
Calibration:Please remember that the test results will be inaccurate unless the tester is calibrated correctly.
Protective Clothing: Basic safety gear such as gloves and safety glasses should be worn at the workplace.
Environment: Make sure that the place of the test is safe, not damp, and there are no things that can cause an accident.
2. Conducting the Operational Test
The operational test checks the mechanical control system of the circuit breaker.
Manual Actuation: Manually open and close the circuit breaker. Check the condition of the mechanical parts which are supposed to work properly, for instance, springs and motors.
Timing: Time Opening and closing the breaker’s operation. This must be done within the limitations stipulated by the manufacturer or else, the electrical system will surely be at risk.
Response to Control Signals: Ensure that circuit breaker properly and accurately reacts to control
signals.
3. Performing the Trip Timing Test
The generator had been used to provide the fault conditions needed for the trip timing test. Accordingly, It was necessary to load such a generator to produce fault conditions of various levels and record the trip timing of the breaker. Being able to trip at the specified time is a feature of a good circuit breaker. Use the following steps:
Apply Test Current to the “Circuit Breaker” with the Tester. A load current that is greater than the normal operating current but lower than the trip current is required for the test.
Timing the Trip: By all means, you should measure the time of the whole process starting from the occurrence of the fault to the time of the breaker’s interruption right after the fault. If the time taken is too long, or too slow, it is an indication of a bad connection with the contacts, which might lead to an arc fault.
4. Conducting the Contact Resistance Test
This test tries to reveal any difficulties present in the contacts of the unit. The presence of high electrical resistance can suggest issues such as worn or dirty contacts.
Prepare the Tester: To take the resistance of the line off the transformer, use the 4-terminal test method.
Find the Voltage: A measurement of voltage when the electric current is small and the contacts are in a state of amperage is called the voltage drop.
Estimate Resistance: Employ the Ohm’s Law equivalent to calculate the resistance that is as low as single-digit milli-ohms. Increased resistance alerts the users about the necessity of the maintenance.
5. Analyzing Results
Document Findings: Record all measurements and observations in a testing log.
Identify Issues: Look for any readings that fall outside acceptable limits. If any problems are detected, schedule maintenance or repairs promptly.
6. Regular Maintenance and Calibration
Follow these maintenance tips:
Routine Calibration: Regularly calibrate the tester according to the manufacturer’s recommendations.
Clean and Inspect: Keep the tester clean and inspect it for any signs of wear or damage.
Software Updates: If your tester has software, ensure it is updated to the latest version for optimal performance.
Conclusion
Operating a circuit breaker tester involves several critical steps that ensure safety, reliability, and compliance in electrical systems. By following these steps—preparation, conducting operational and trip timing tests, performing contact resistance tests, analyzing results, and maintaining the tester—you can effectively verify the performance of circuit breakers.
Buying a good and durable high voltage switch tester will help you to perform the best possible circuit breaker test ensuring the safe . If you are searching for a high-standard testing machine, you can look no further than our range of circuit breaker testers. Contact us now to learn more!
